 ..
.. ..
..
Materials
Tray, re-usable
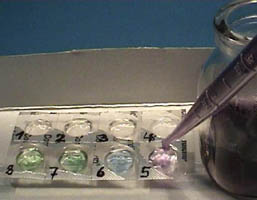
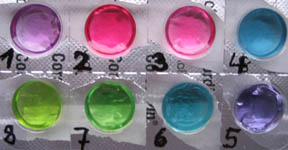
tablet container with 8 blisters, fresh water (1), vinegar (2),water
with vitamin C (3), water with table salt (4), water with Dead Sea salt (5), water with Kaiser
Natron (6), water with washing
soda (7), lime water (8),
9-Volt battery, two insulated copper wires with crocodile clips, light
emitting diode (LED), pencil lead,
spatula (cut from a drinking
straw) , plastic pipette,
stirring rod (piece of insulated copper wire), tissue paper.
Experiment
1. Add spatula
tips of table salt, Dead Sea Salt, Kaiser Natron and washing soda to blisters
4, 5, 6 and 7.
2. Starting with battery water add 10 drops to blister 1, 4, 5, 6
and 7.
3. Put 10 drops of fresh water into blister 2, 10 drops of soda water
into blister 3 and 10 drops of lime water into blister 8.
4. Stir in blisters 4 - 7 to dissolve the salts. Clean the stirring
wire after each use.
5. Connect the positive terminal of the battery with the pencil lead
and the negative terminal with the short wire of the LED.
6. Starting with blister 1, close the circuit by dipping the free
ends (wire and lead) into the liquid.
7. Go on with blisters 2, 3, 8, 4, 5, 6, 7.
Observations
1. The LED show light of
different brightness in blisters 2 - 8. See Fig. 3 showing blister 4.
2. In blister 1 no light at all can be seen.
Explanation
1. Die Leitung
des Stroms durch Flüssigkeit besorgen positiv und negativ geladenene
Teilchen (Ionen).
Je mehr davon gelöst sind, desto mehr Strom fließt,
und desto heller leuchtet die LED
2. Auch in Blister 1 sind Ionen vorhanden. Der von ihnen ermöglichte
Stromfluss lässt sich nicht durch die LED testen, wohl aber durch
ein hochohmiges Messgerät registrieren.